|
Checklist:
1. Camera 2. Lenses 3. Tripod 4. Ligt meter 5. Magnifying Loupe 6. Cable Relese 7. Film Holders 8. Dark cloth 9. Blower and Lens Cloth 10. Notepad and Pen Step 1: Setting up your tripod Make sure all places are locked in place and the tripod is how you want it. Step 2: Level your camera Use the spirit level on the tripod and the camera. Step 3: Initial focus and Composition Controls are not the same on all cameras. Make sure to focus as much as you think before using the magnifier. Remember to use the dark cloth over your head and camera. Step 4: Refine the focus Press the magnifier up against the glass and focus completely. Step 5: Lock down the camera Make sure its locked in place so it doesn't come off or lose as the camera is very heavy. Step 6: Meter Reading This is so you can set the aperture and shutter speed. Step 7: Inset Film Holder and Film. remove dark slide. Trip the shutter Make sure you close the lease before you do all this. Once you have taken the photo, put the dark slide back in.
0 Comments
Large Format is a print that is any image format of 4x5 inches or any bigger. Large format is bigger than Medium format and uses the film 24x36 mm frame of 35 mm format. The main advantage of a large format is a higher resolution at the same pixel pitch, or the same resolution with larger pixels or grains. A 4×5 inch image has about 15 times the area, and thus 15× the total resolution, of a 35 mm frame. Large format cameras were some of the earliest photographic devices, and before enlargers were common, it was normal to just make 1:1 contact prints from a 4×5, 5×7, or 8×10-inch negative.
Lesson 1: You CANNOT change you ISO
In medium format, you ISO is fixed for the measurement of the sensitivity of the roll of film. Lesson 2: Use you DSLR as a light meter Shoot your photograph with your DSLR first, to find out what settings your camera needs tone on. Then you can change your medium format to match. This is an accurate light meter. Set your DSLR to the ISO of the film you have loaded, and then apply the correct aperture and shutter speed. Lesson 3: Bring a tripod Remember to bring a tripod so you can sit your camera on top of it. You will find this much easier as you don't have to hold it or lean it on anything. Also, if you don't use a tripod, your photographs will much certainly be blurred. Use a tripod and make sure the level is straight. Lesson 4: Load the film correctly The A12 back had two places for film spools. There is one at each side. The new roll goes on the left hand side and take the empty spool to place in the light hand side. When you take the photographs, the film will go onto the old spool, leaving the new spool to use next time, as the 'old' spool. Once you have it all loaded and set up, this is now how to take the photograph. Step 1: Open the top of the camera, so you can look though and see a picture. Step 2: You won't be able to see anything at this point, it will look all blank. To see an image, you need to push the leaver, at the side, all the way down. Step 3: Then you have to make sure your film is ready to take a shot. Step 4: Focus your camera so the object you're photographing is in focus. Step 5: Remove the mirror. Step 6: Press the button at the front, to take the photogrpah. A medium format camera is used for still life photography. The term 'Medium Format' is generally used for cameras that take images on film larger then 24mm by 36mm (full frame), used in 35mm photography, but smaller then 4 inches by 5 inches. This bigger size is normally referred to a Large Format Camera. Medium format cameras were used the most in the 1900s, though to the 1950s. Nowadays, they're only used by some photographers. In digital, medium format is a very expensive option. The new all-digital medium formant cameras are selling for $10,000 for a Mamiya ZD, to $32,000 for a Hasselblad H3D. 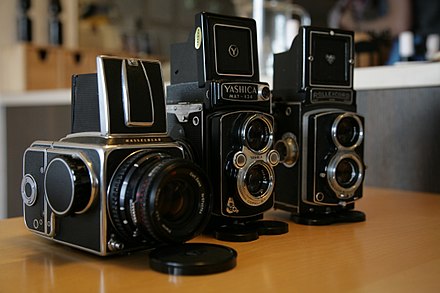 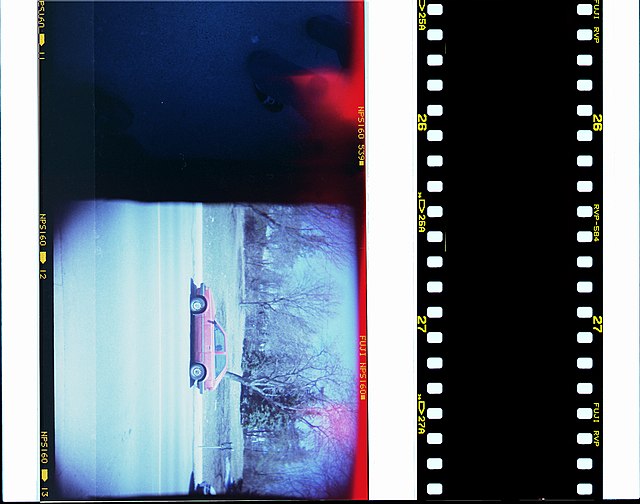 This is the difference in size of film. the film on the left is the medium format camera film, and the film on the right is the normal 35mm film.
|


